


Like many kids of my generation, I began my video game "career" by playing with consoles. Later, from 2002 on, I became a hardcore PC gamer and mostly cast them aside, barely looking back. It wasn't until years later, with some money to spare and a renewed interest in old software, that I began a modest collection of console hardware and physical games. You see, I have a strict no-piracy-at-all rule, even when it comes to abandonware.
I had a basic understanding of the different console versions there were available, of course. You had regional variants which often had mutually incompatible games (PAL, NTSC-U, NTSC-J...), and then you had models that introduced both a new internal design and an external physical appearance. For example, I knew that the PS2 had the original "fat" and the later Slim model with a new form factor, and so on.
What I ignored was that, across the lifespan of any console, many small changes were introduced that weren't always obvious or even noticeable at all at first glance. These were called revisions and we could make an analogy with minor software updates, i.e., going from v1.1 to v1.1.1 or v1.2. To check which exact revision you had, reading the label was sometimes enough, but having to open it up wasn't uncommon.
And the latest revision wasn't always the best, most desirable one to own. Companies tried constantly to save costs and that usually meant removing features (like backwards compatibility), expansion ports, video outputs, etc. Cheaper components replaced the initial ones. Multiple chips were integrated into a single one, making repairs difficult or impossible. Other times, new bugs were accidentally introduced. So unless you do a little research, it's like lottery.
The Console Modding Wiki website proved invaluable in gathering this data. There, you can choose a brand and model, and then browse the Model Differences page (or anything similarly sounding). Additionally, every console has its own dedicated communities with detailed hardware specifications. Your search engine of choice will reveal them.
After becoming aware of this fact, I spent almost a month reading about the subject and "fixing" my collection. To my dismay, I realized I'd need to replace a few consoles. And shopping for those very specific revisions wasn't an easy task; quite the contrary. Many sellers weren't knowledgeable about this information (and asking them to dismantle it was a delicate issue); some didn't even know the first thing about games at all; some thought I was trying to scam them. It was quite a headache but I must admit it felt satisfactory in the end. I unlocked new abilities, like being able to quickly identify a revision from a low-res photo (I must have seen hundreds), or performing a full disassembly. I used the latter not only to read the silkscreen lettering on the motherboards, but also to clean the insides thoroughly. I even took the controllers apart (it's incredible the amount of dirt they collect!). All in all, I had a great time and learned a lot.
To make this effort less of a waste, I'll now share my notes with you, to save your time and sanity if you ever want to attempt the same. Please mind, that this is absolutely not necessary for normal usage; basically any model will serve you well for playing games. I only did this due to my crippling perfectionism (not recommended).
Note: where applicable, this article always refers to PAL models. Sorry, non-Euro people!
| INDEX |
| 1. Game Boy 2. Game Boy Pocket 3. Game Boy Color 4. Super Nintendo 5. Nintendo 64 6. Sega Saturn 7. Sega Dreamcast 8. PlayStation 9. PlayStation 2 10. PlayStation 3 |
Nintendo
Game Boy (1989)
- Best revision: anything from
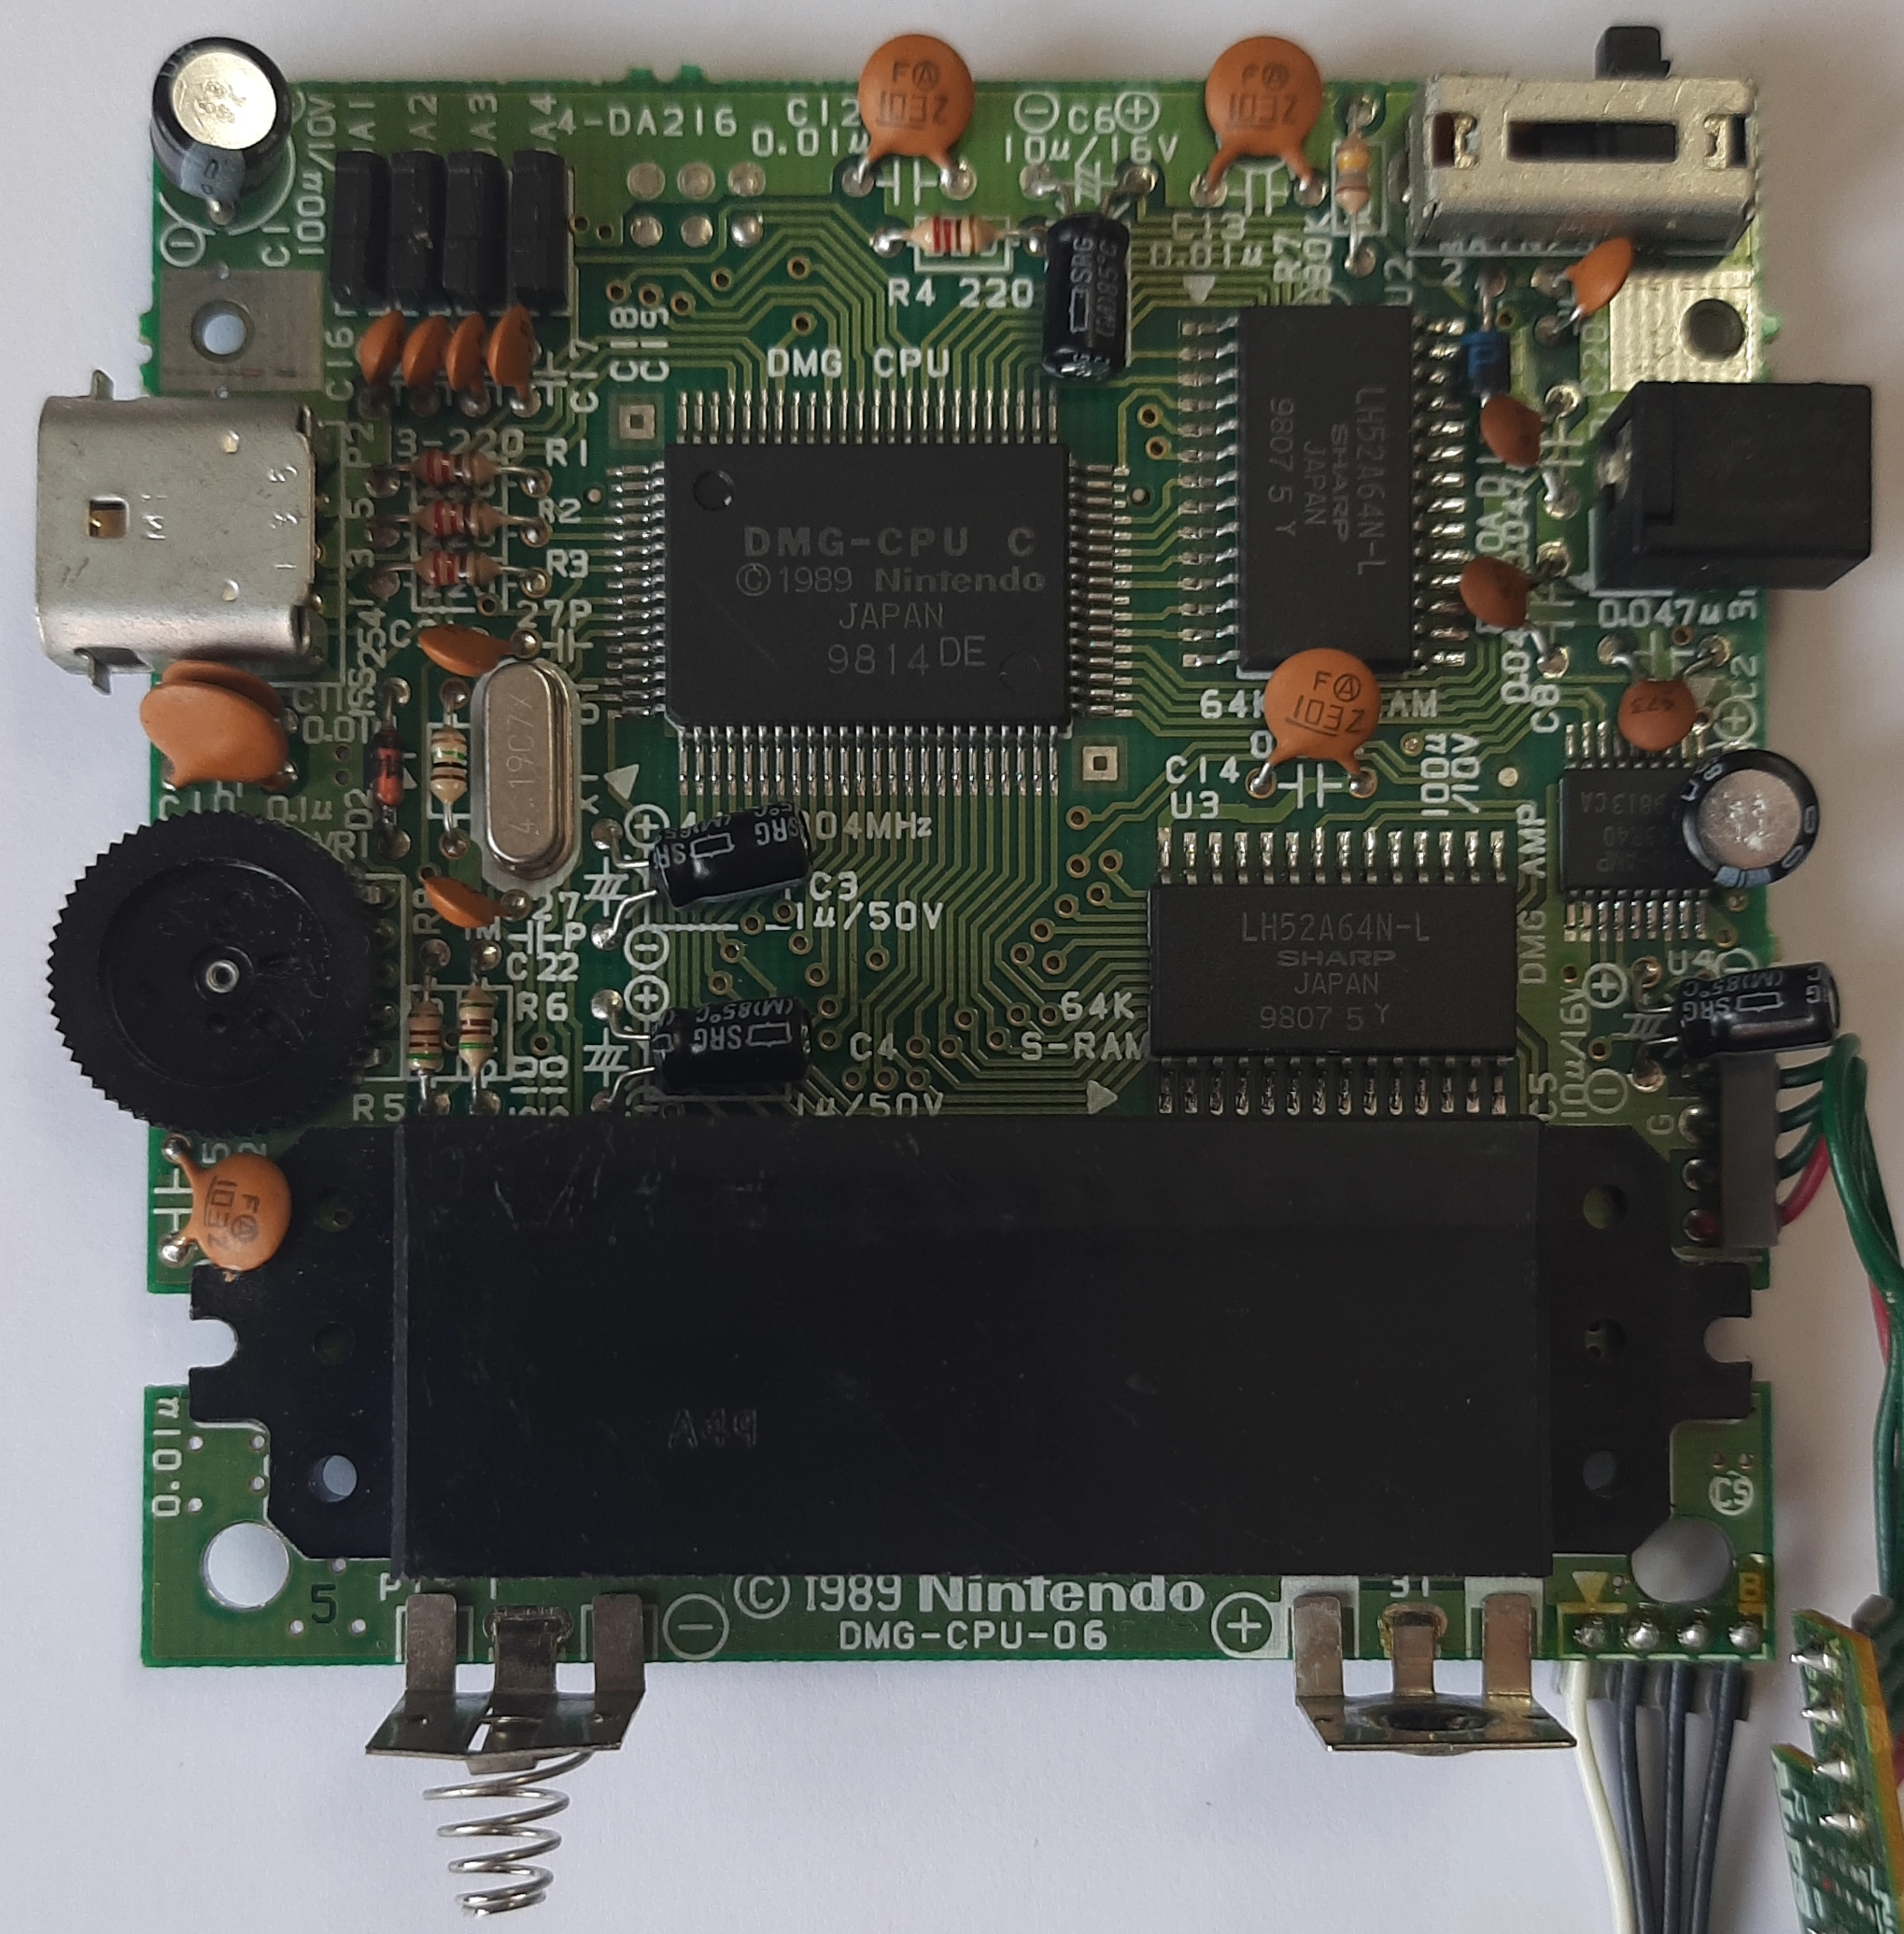
DMG-CPU-06onwards is desirable, not that it makes much of a difference anyway. Be aware that both DMG-CPU-07 and DMG-CPU-08 (the last ones to be released) reduced costs by fitting both CPU and RAM into a single chip, so modding and repairing them is troublesome. Other than that, they're a good choice too. - How to check: remove the battery cover lid, and the batteries, if present. You'll see two holes to the left that allow to check the circuitry below. Through the biggest one (lower left), under the spring, two digits can be glimpsed, printed on the board, e.g.
06for the DMG-CPU-06. Otherwise, you'll have to disassemble it (which requires a Y1 tri-point screwdriver).
Game Boy Pocket (1996)
- Best revision:
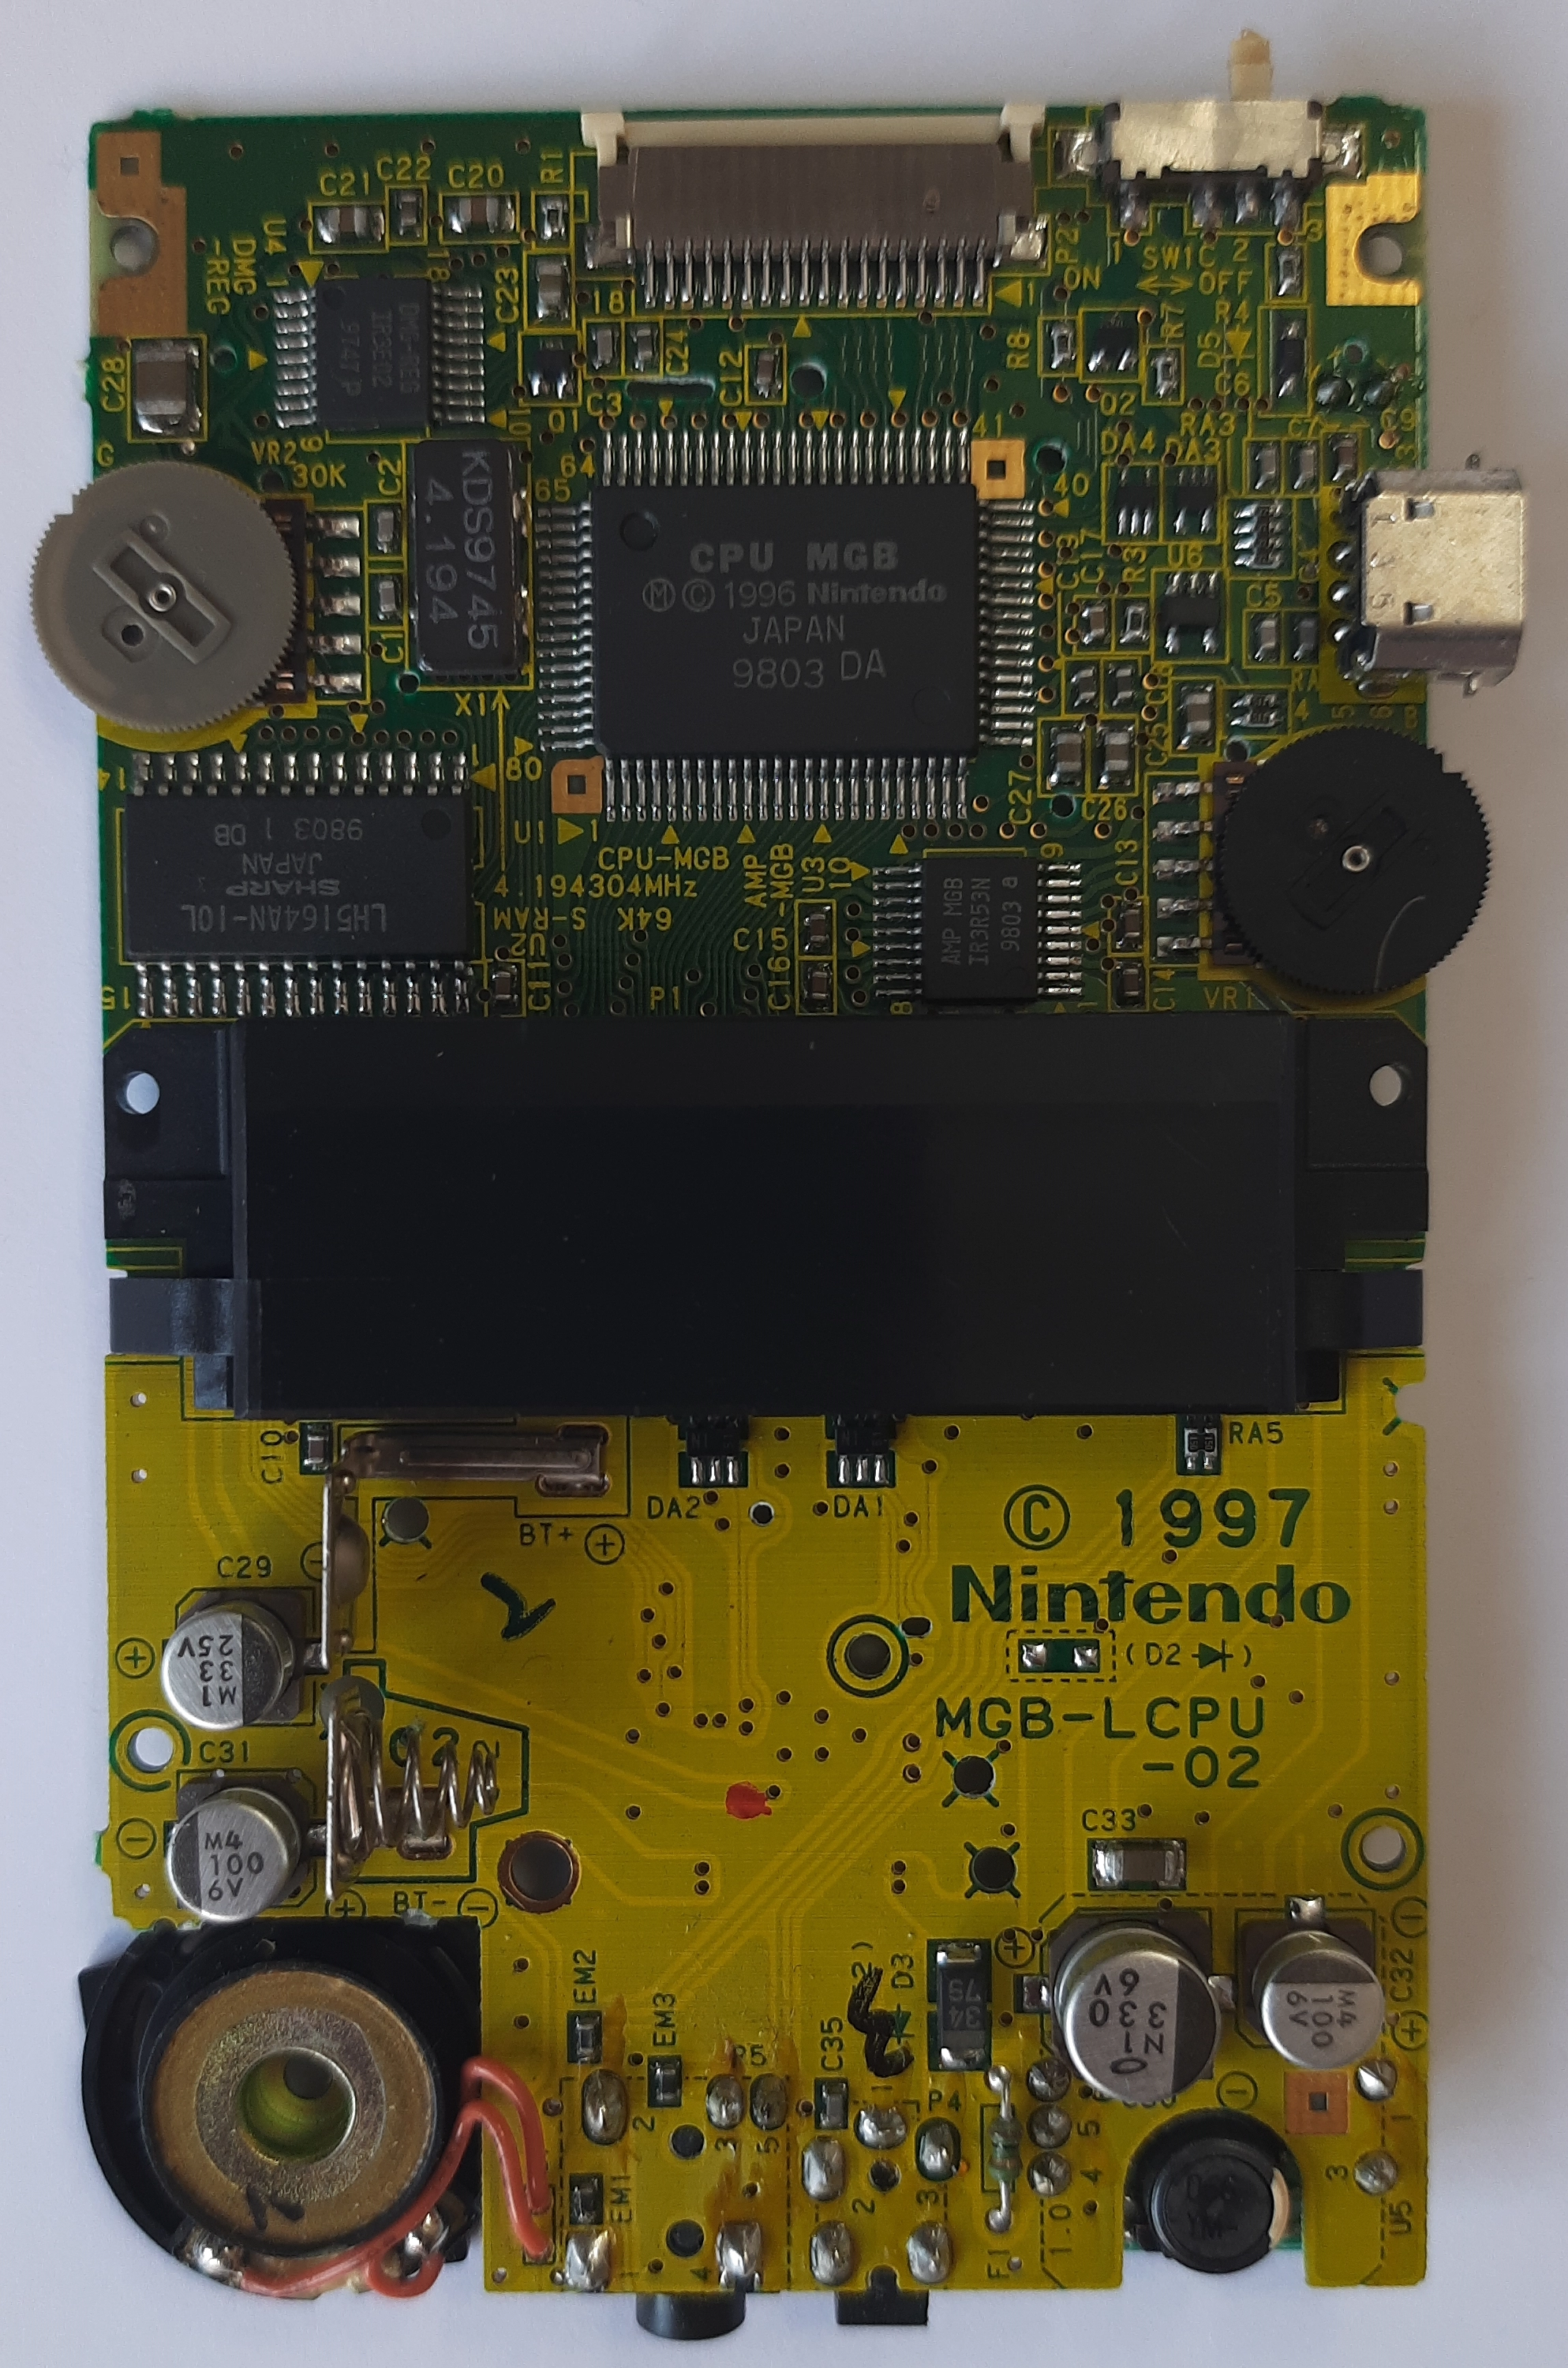
MGB-LCPU-02, which is also the last one. The "L" versions introduced a handy power LED indicator that the original lacked. - How to check: same as with the classic model.
Game Boy Color (1998)
- Best revision:
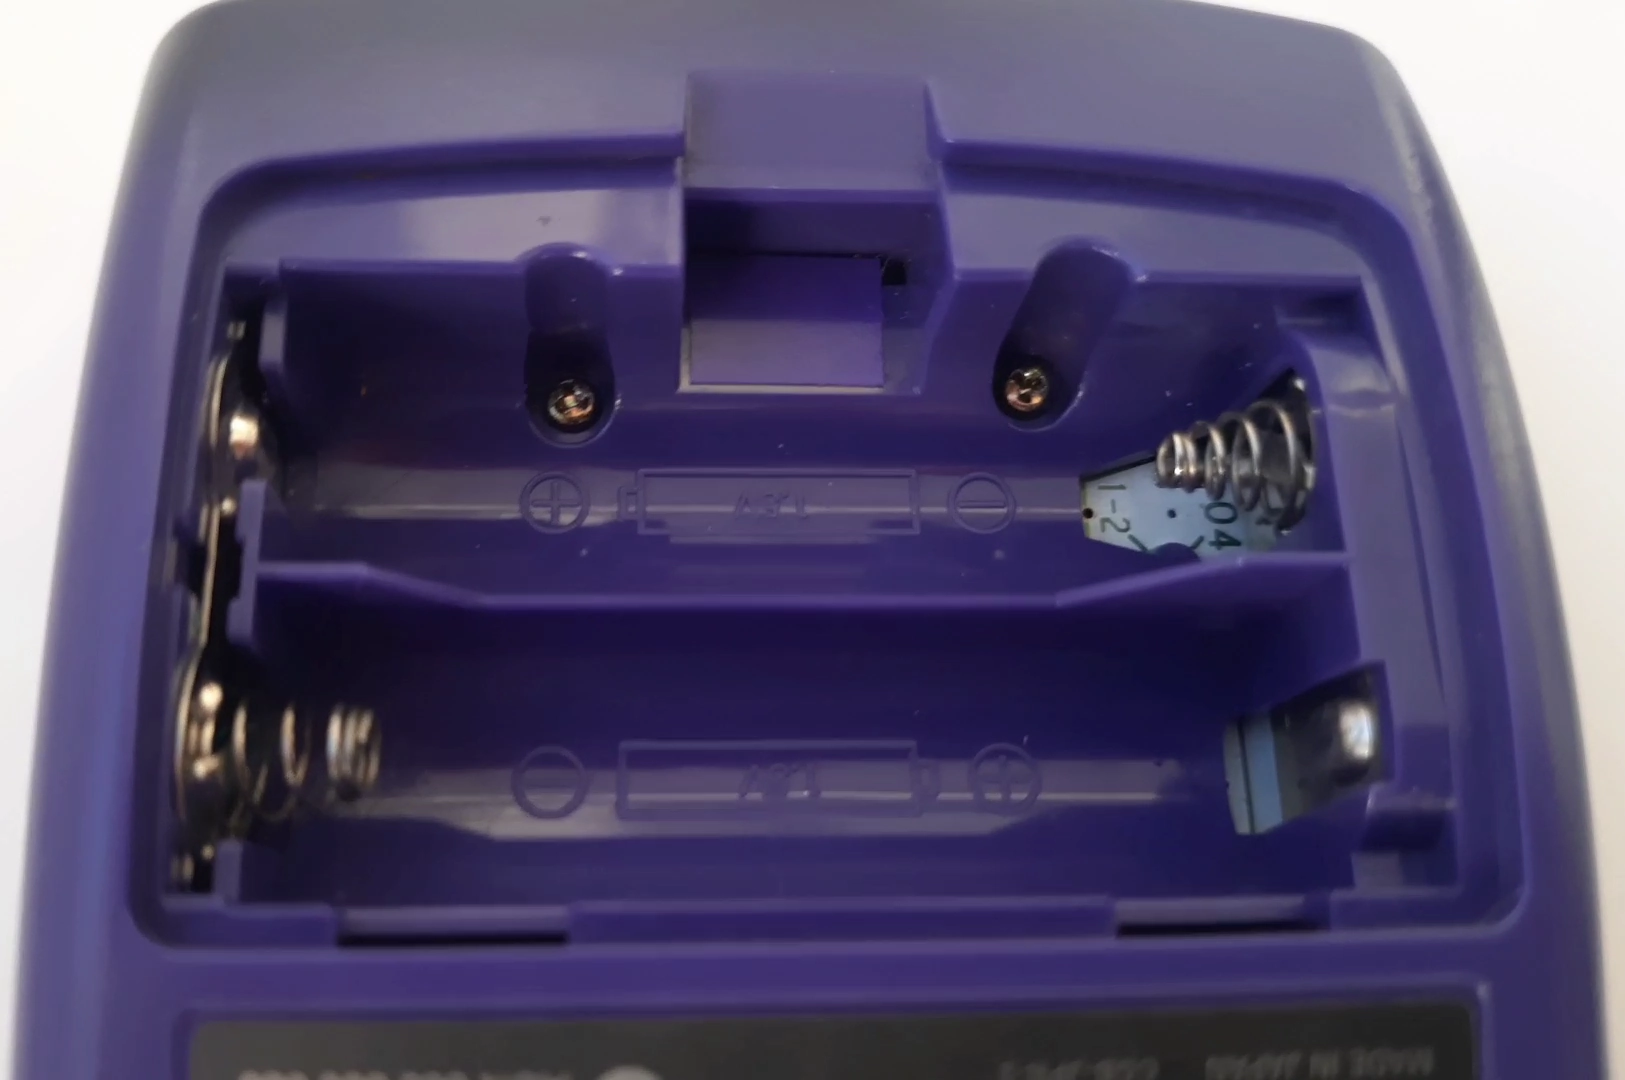
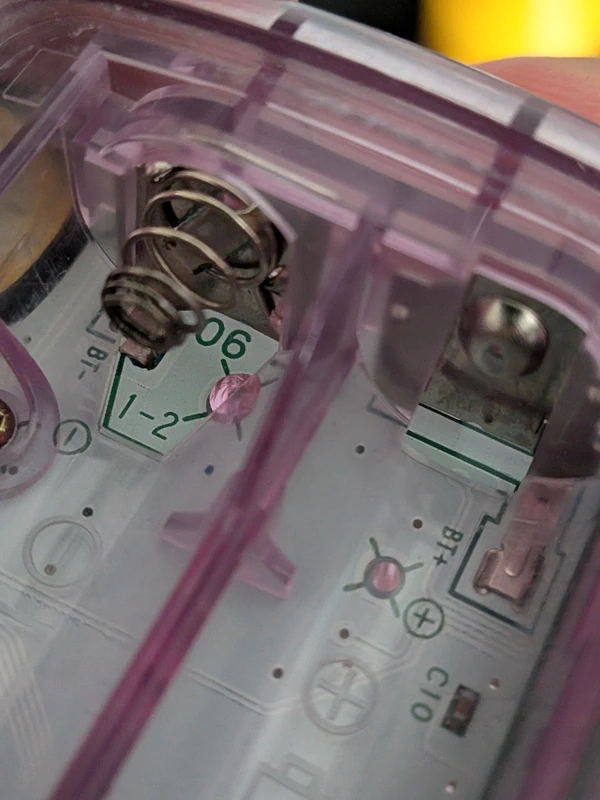
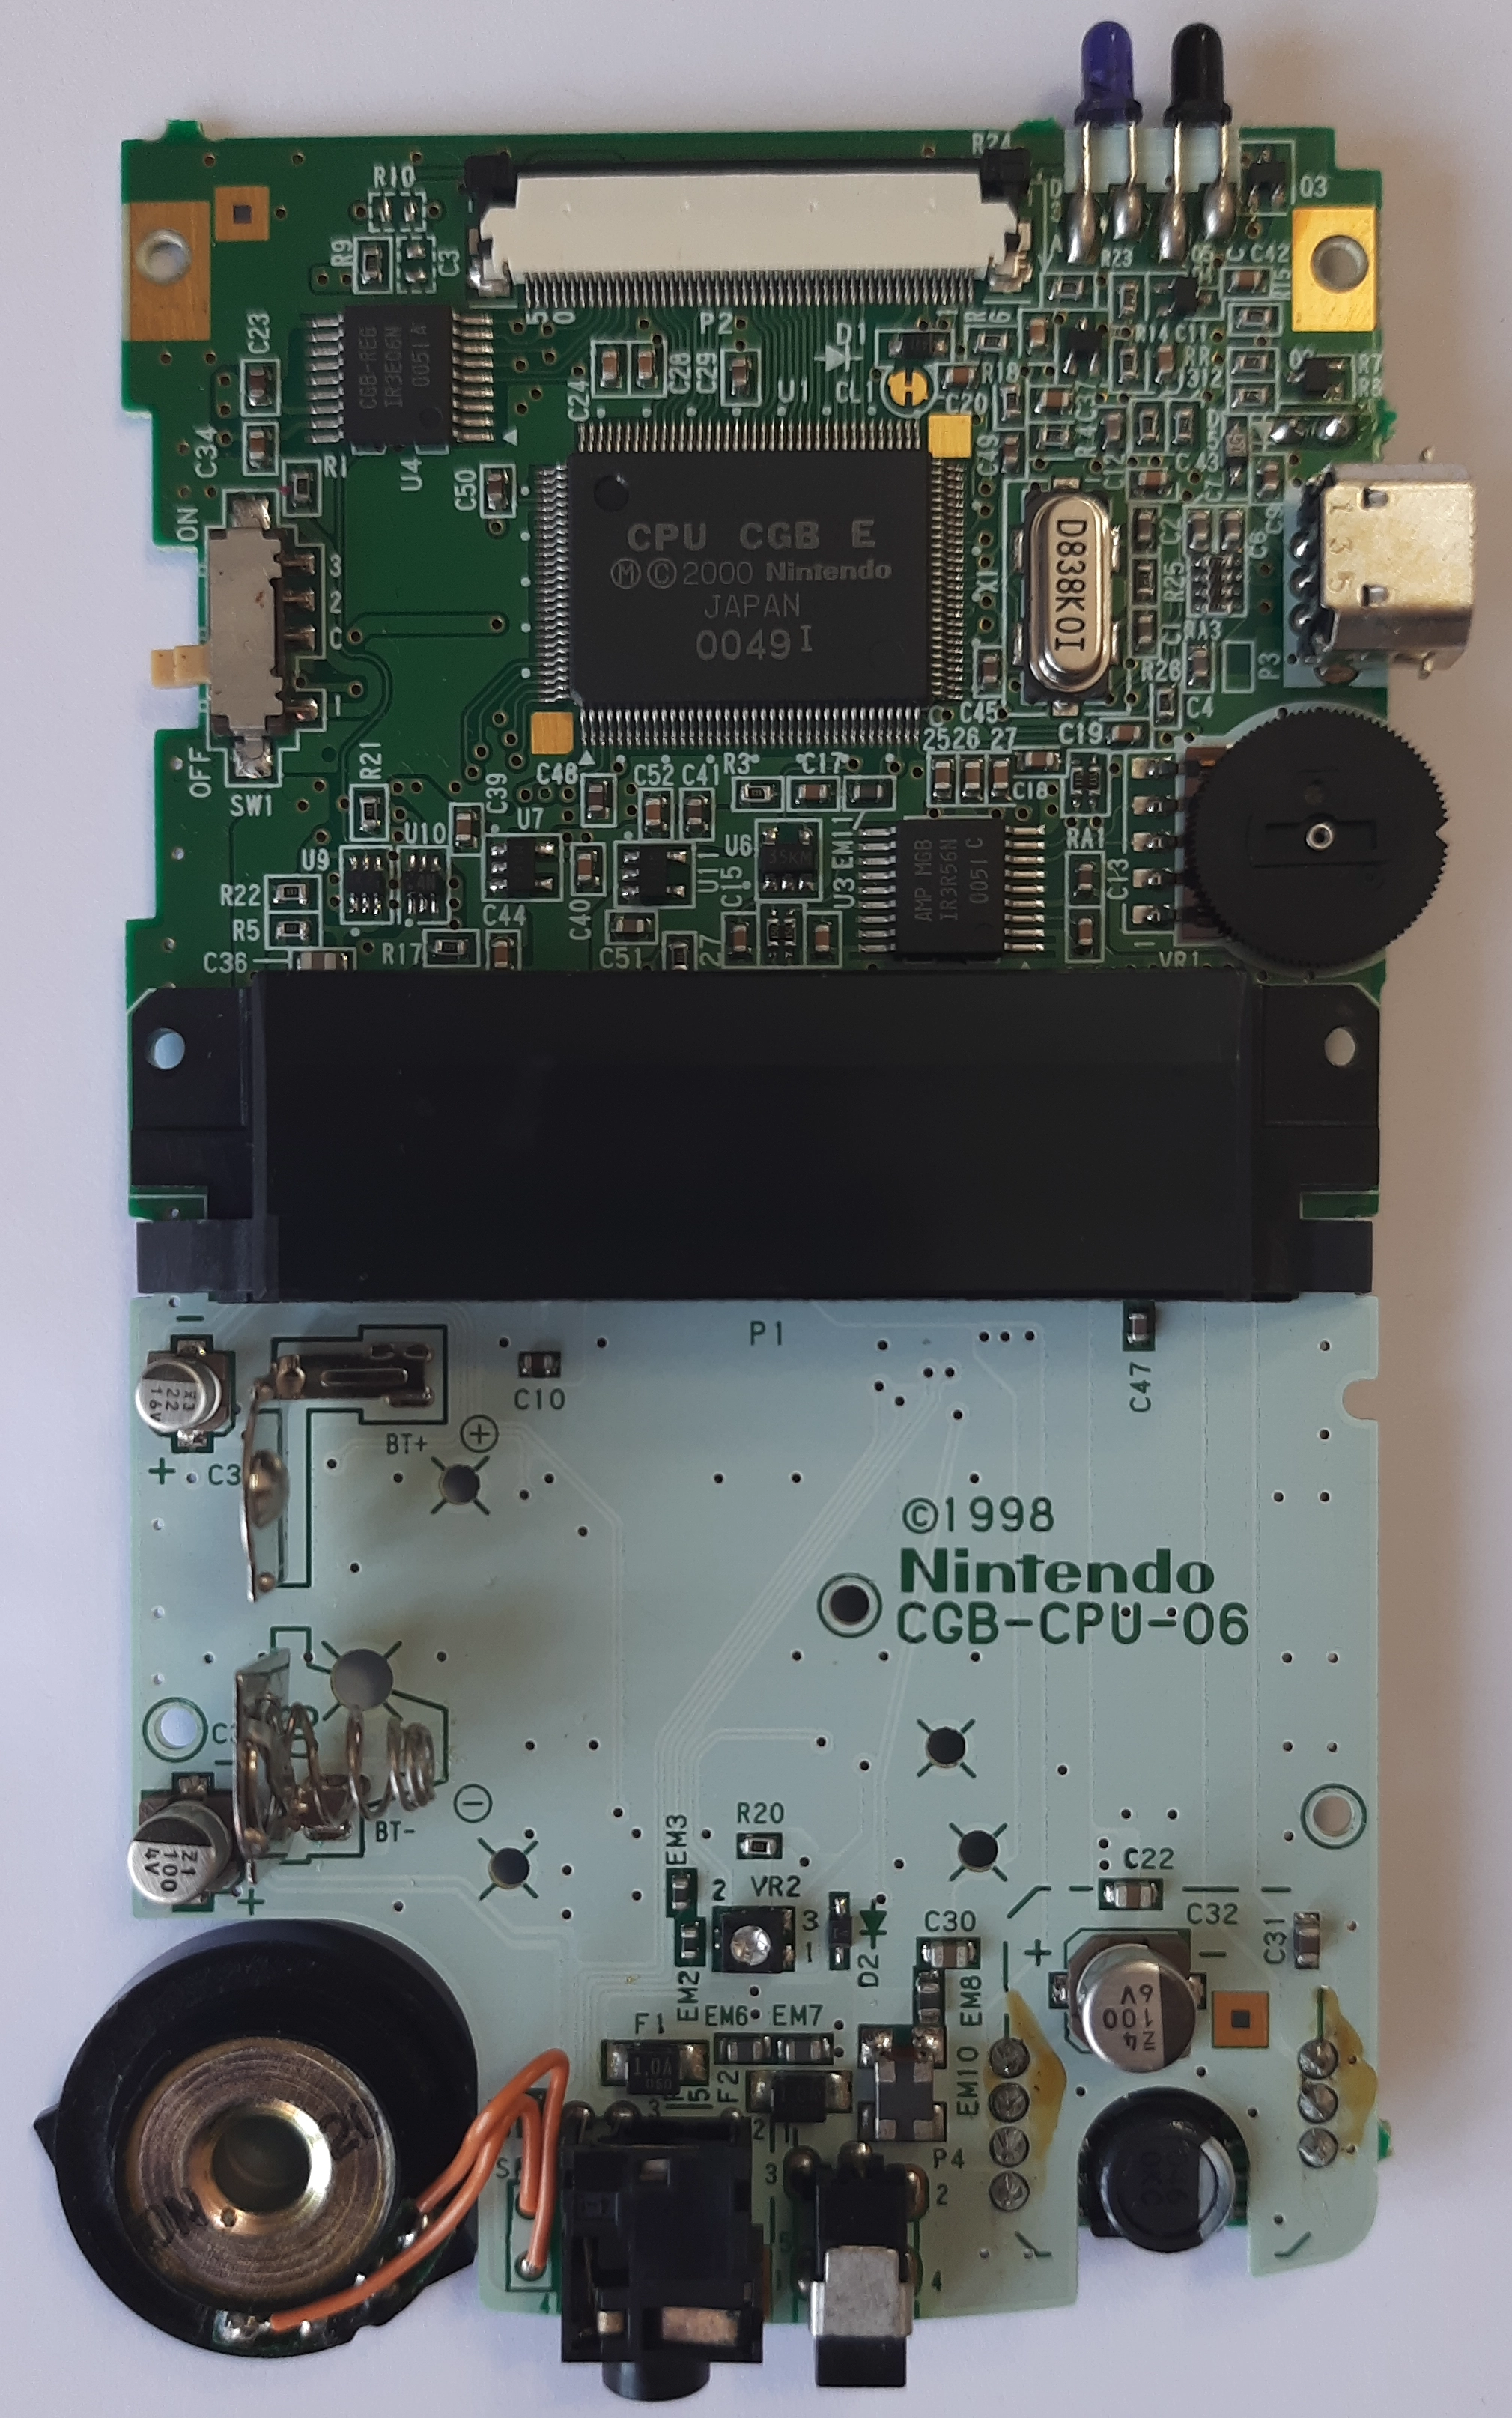
CGB-CPU-06, also the last one. It fixed a small bug introduced in previous versions. It also integrated the RAM with the CPU into a single chip. - How to check: same as with the classic and Pocket models.
- Tip: from my experience, serial numbers from
C21...andCH24...onwards will have this newer board.
Super Nintendo (1990)
- Best revision:
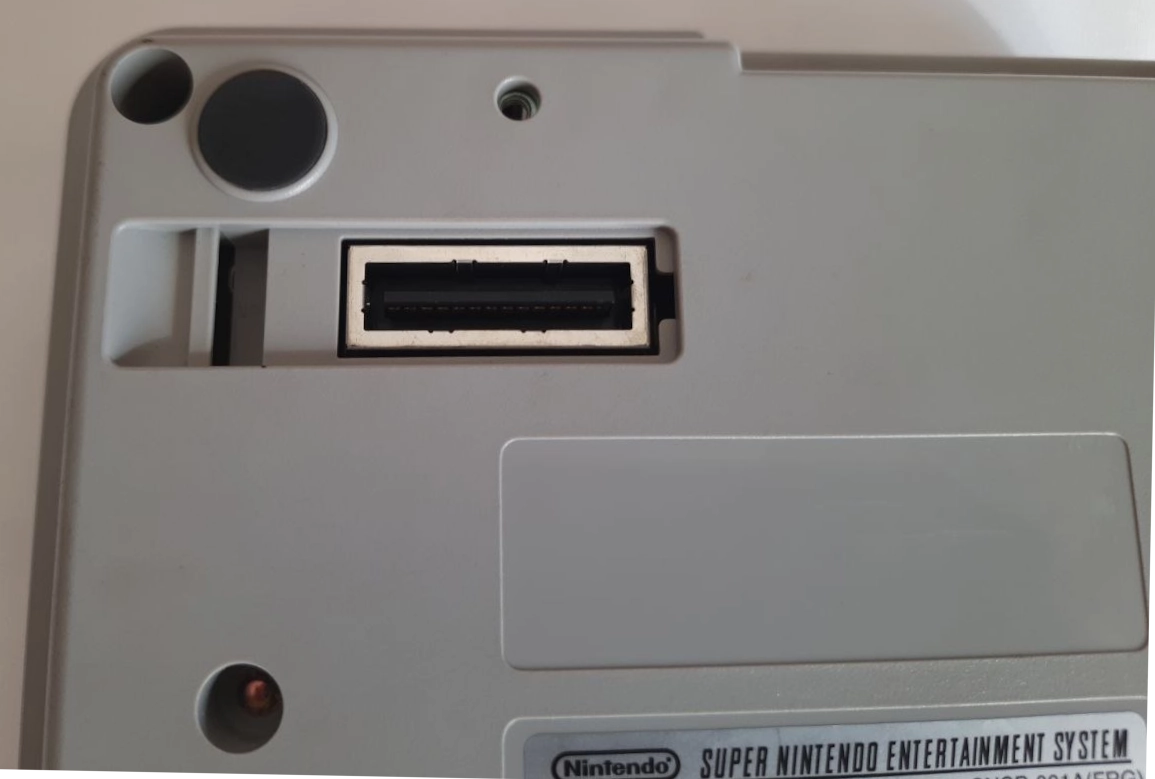
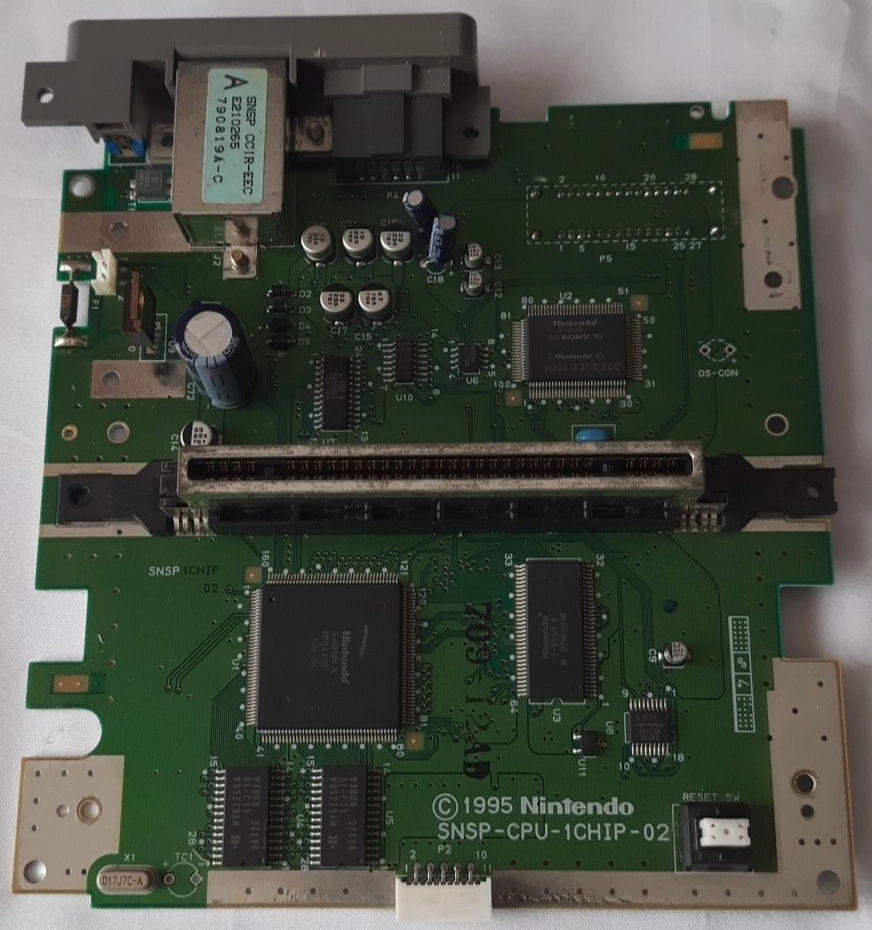
SNSP-CPU-1CHIP-02, the last PAL SNES one. 1CHIP consoles are preferable and sought-after (improved image output when compared to multi-chip ones), and the 02 seems to have slightly better picture quality (not much to be noticed during normal gameplay though). - How to check: inspecting the looks of the EXT port may give a clue about whether or not it's a 1CHIP, but the only indubitable way to determine the revision is to open the shell (for which you'll need a 4.5 mm Gamebit screwdriver), and read the printing on the board (lower right) after removing the cartridge eject mechanism and the metal EMI shield (with a Phillips #2 screwdriver).
- Tip: serial numbers from
UP18...onwards should have a 02 board.


Nintendo 64 (1996)
- Best revision:
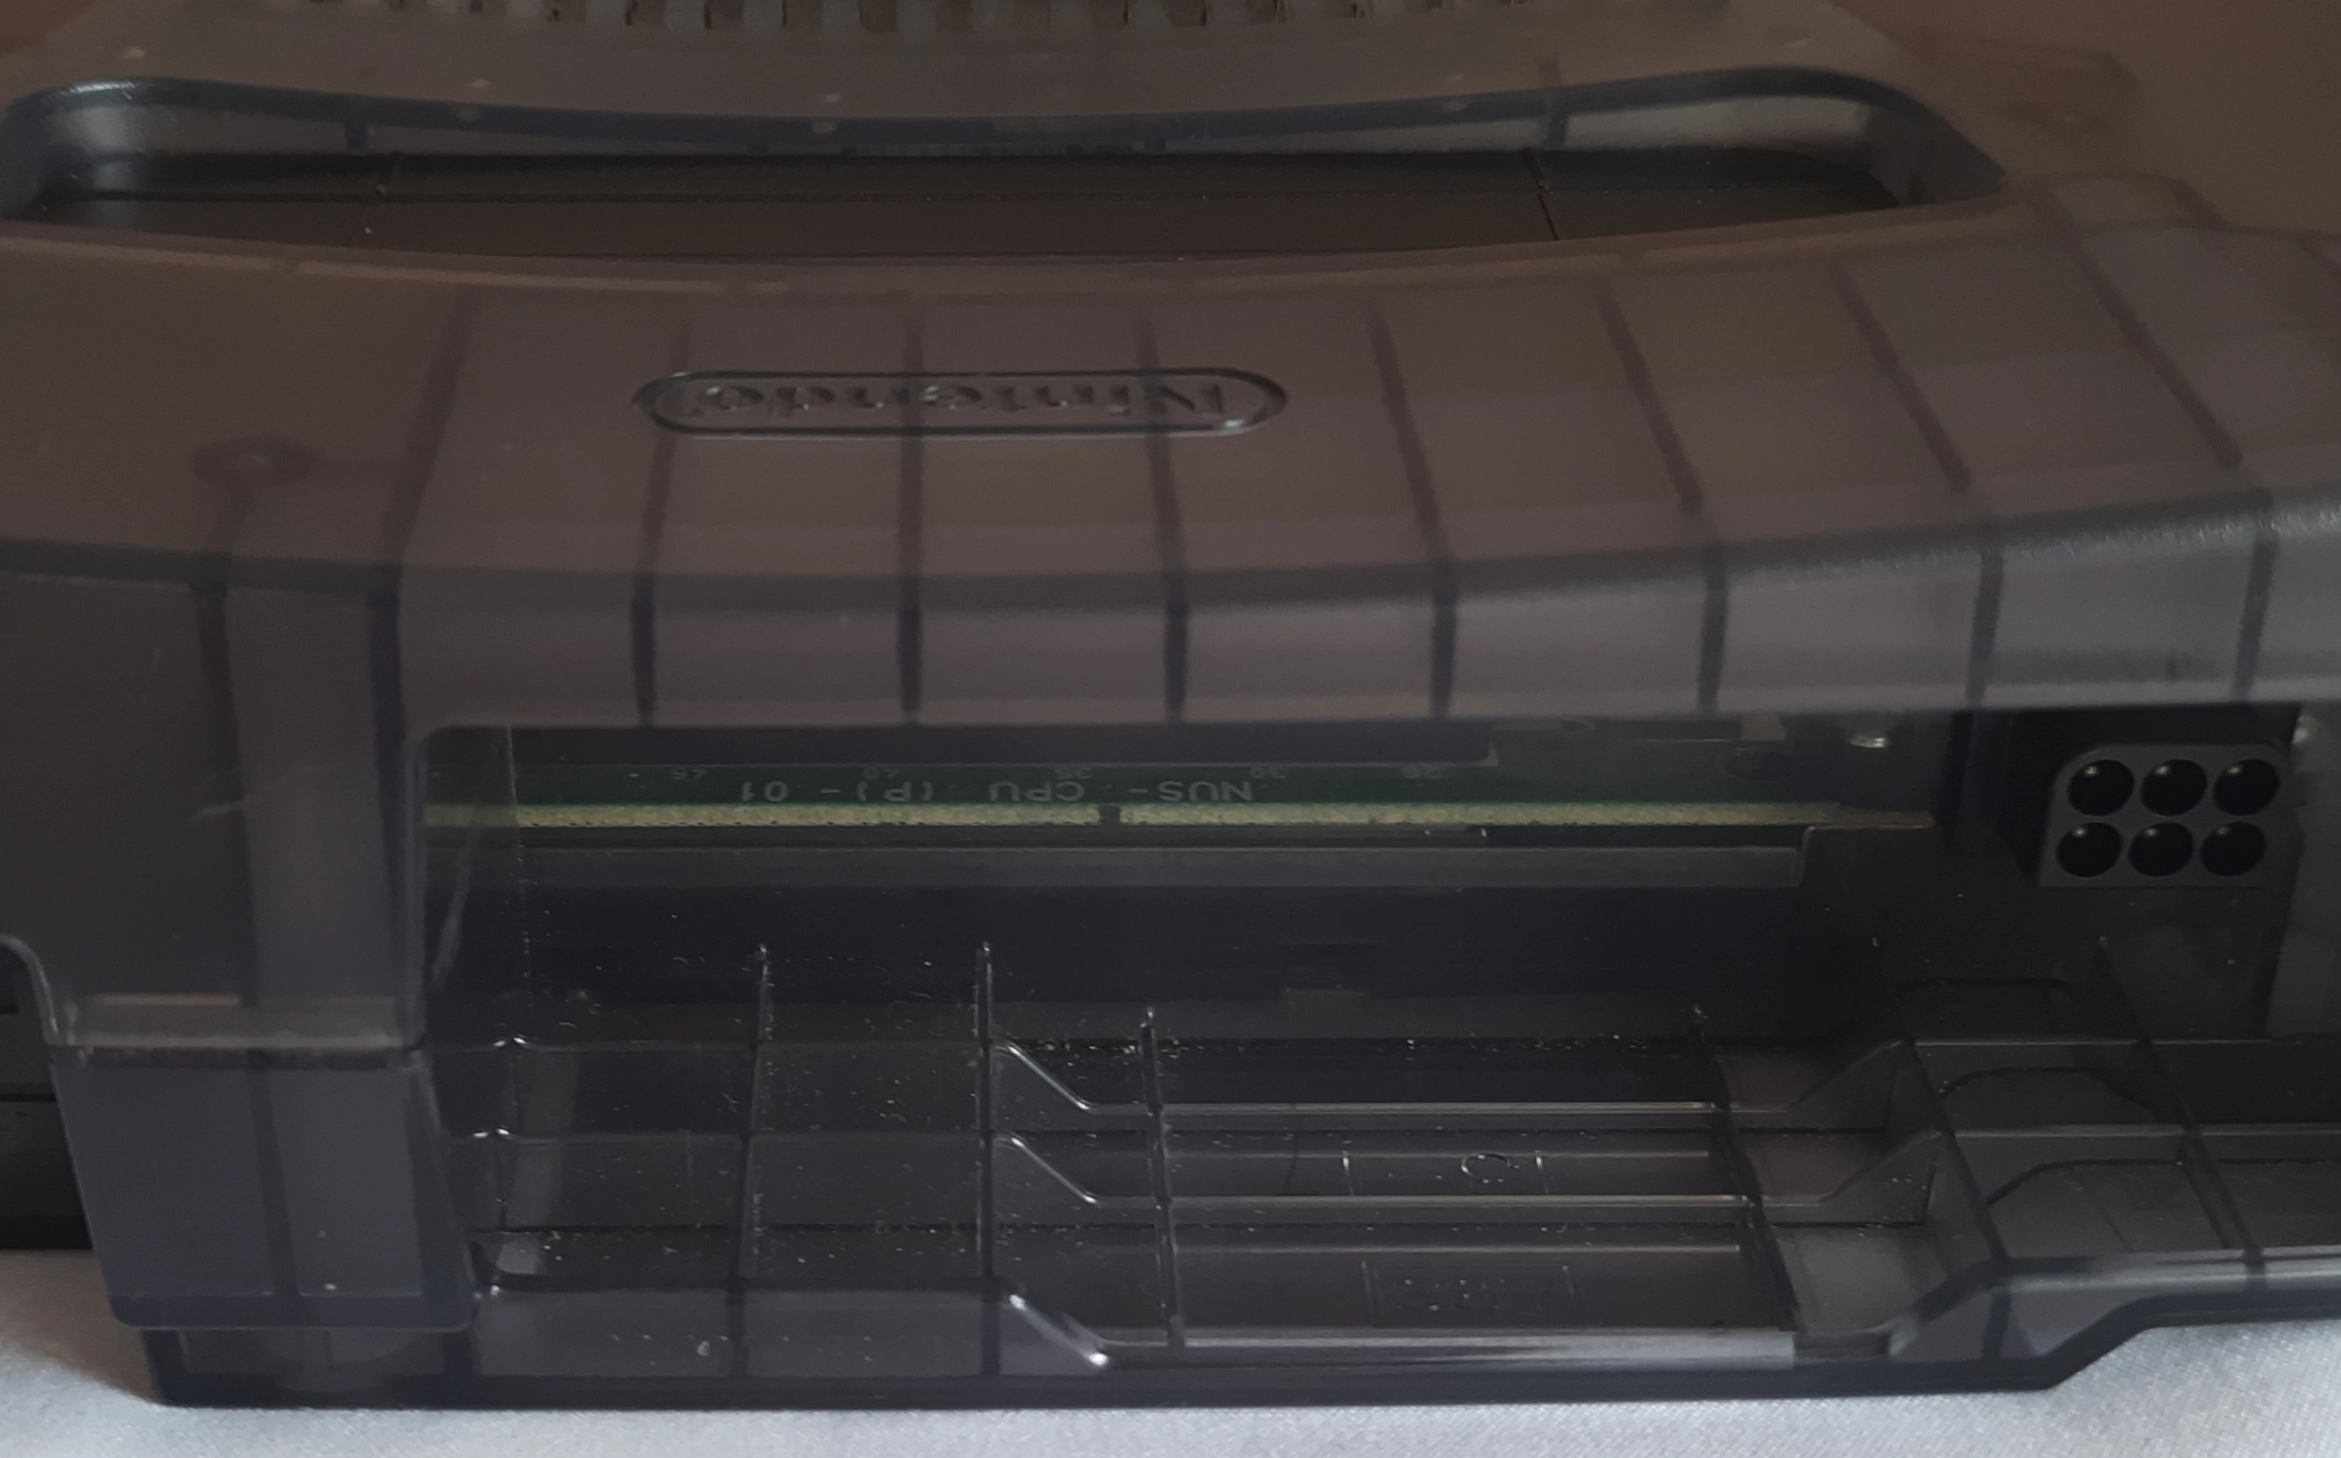
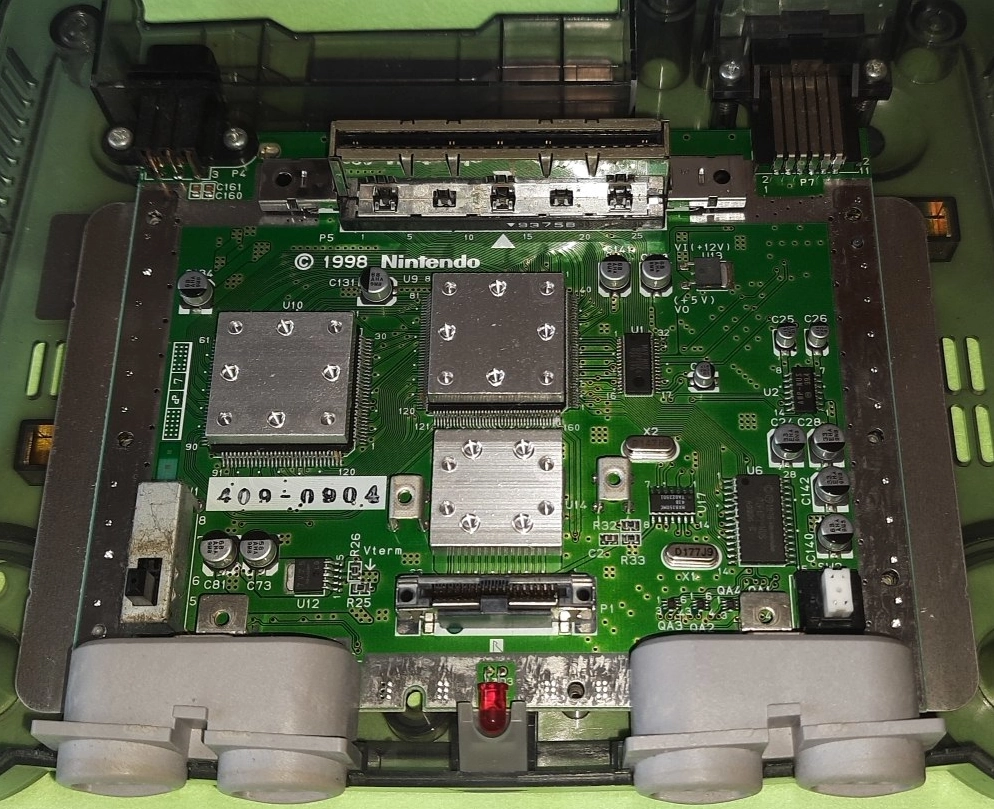
NUS-CPU-P-02. There was a later 03 one, but it removed the S-video output capability, something undesirable (it can be restored by modding though, but I dislike that). - How to check: if you have a transparent color edition, detach the power supply unit (PSU) and look through the back of the slot to read the printing on the board. Otherwise, you'll have to remove the top shell (with a 4.5 mm Gamebit) and check the board version; it's printed behind the cartridge connector (up, if you're looking at it from above).
- Tip: seek a Funtastic (color) model, but NOT the Ice Blue or Pikachu Edition ones (those are almost surely 03).
Sega
Saturn (1994)
- Best revision: the Model 2,
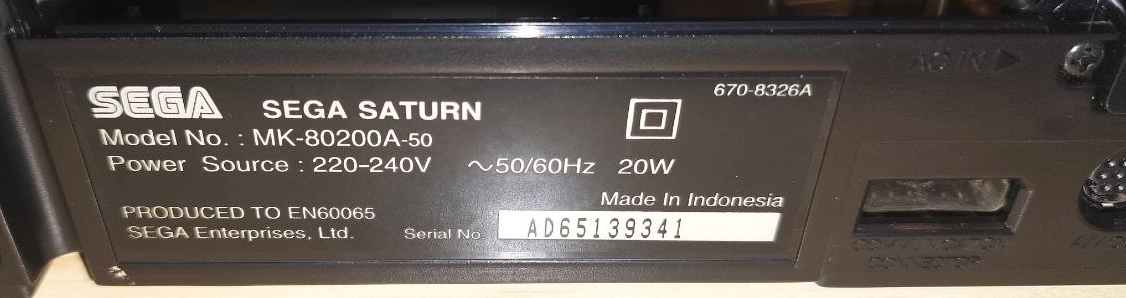
VA13was the last PAL one, but it's very hard to find. A VA9 (the immediately prior from those available in this territory) is a good choice too. - How to check: very easy, as the serial number (printed on the label at the back of the console) encodes the year and revision. The second digit (if the S/N begins with a number) or the third one (if it begins with a letter) is the year, and the next one the revision. So for example
**7Dwould be a VA13 from 1997, and**69a VA9 from 1996. You can tell Model 1 and 2 apart instantly by looking at the power and reset buttons: oval in 1, circular in 2. Also, boxes for Model 1 are longer, whereas Model 2 boxes are squarish. - Tip: there's also a handy webpage that identifies the model for any serial you type.
Dreamcast (1998)
- Best revision:
VA1. The last one was VA2, but it fixed the MIL-CD exploit that allowed to easily run homebrew, and it's quite rare (so finding replacement parts is more difficult), so it's a matter of taste. As a side note, VA1 Dreamcasts are much more likely to have a Samsung GD-ROM drive, less reliable than the Yamaha ones. - How to check: even easier than with the Saturn. Turn the console upside down and check the sticker label. Next to the region code, there's a single digit inside a circle (
1for the VA1).
Sony
PlayStation
- Best revision:
SCPH-9002, the last PAL one. Some people fancy the white, smaller form factor PS One from 2000 instead, stating its disc drive may be slightly better (not that the 9000s' are faulty, mind you, just a year older). I prefer the looks of the old gray box myself. - How to check: without a doubt the easiest of the lot. The revision appears clearly in both the original packaging and the label at the bottom of the console, so thank you, Sony.
PlayStation 2
- Best revision: here we need to make a distinction. There are two different models with their pros and cons:
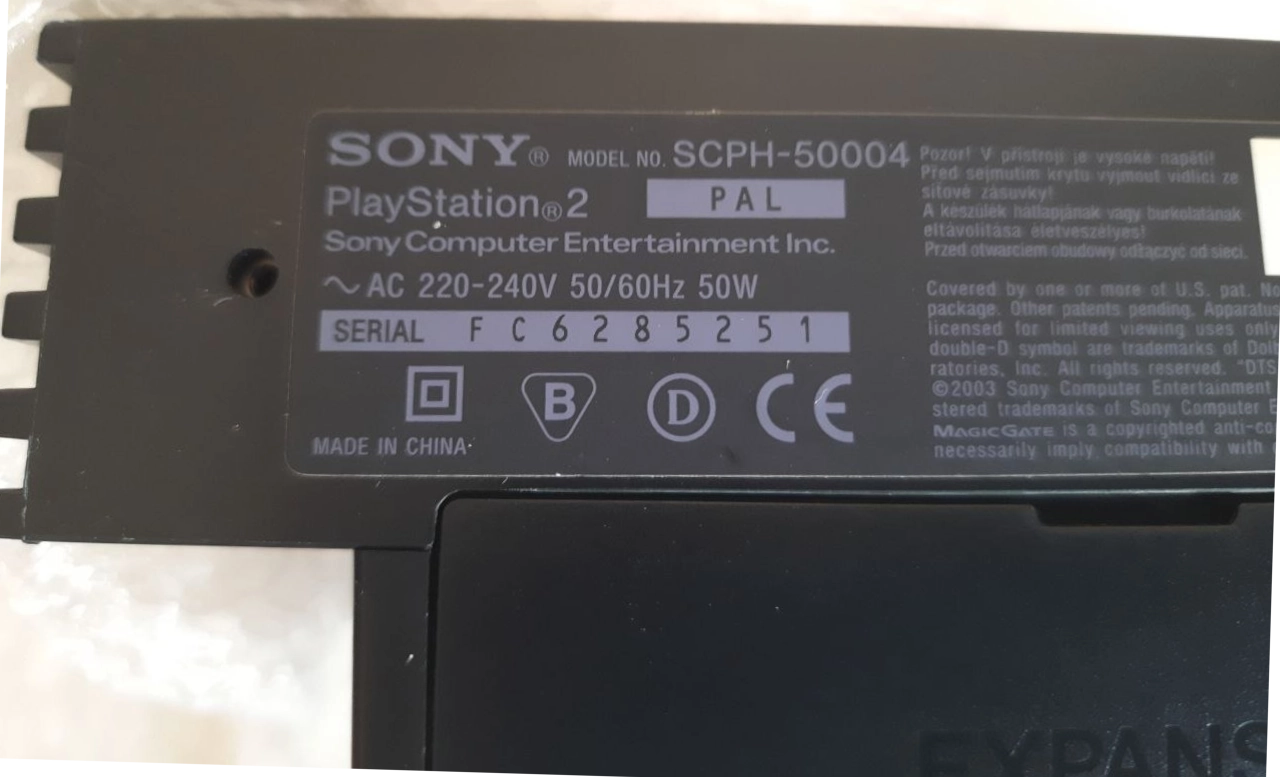
- The original, "fat" or "phat" PS2, with an expansion bay for plugging a hard disk drive (which requires a Network Adapter): look for a
SCPH-50004, the last one. It has a built-in Ethernet port, plus an IR receiver for remotes, but it removed the IEEE 1394 (FireWire/i.LINK) port. - The Slim version, way less bulkier and with Ethernet, but losing HDD support: buy a
SCPH-90004, the last revision. The laser reader units are more reliable than the 70000 series, and they have an internal PSU, requiring no external power brick.
- The original, "fat" or "phat" PS2, with an expansion bay for plugging a hard disk drive (which requires a Network Adapter): look for a
- How to check: like with the PSX, either the box or the label at the back (fat) or underside (Slim).
PlayStation 3
- Best revision: you have the original "fat"/"phat", the Slim and the Super Slim variants, and the one you should look for is the latest Super Slim model, the
CECH-43XX. They used a 28-nanometer manufacturing process for the RSX (the PS3's GPU), which allows for better power and thermal efficiency. It's common knowledge that backwards compatibility worsened along the route: earlier fat models hosted a full PS2 hardware implementation, but soon they switched to software emulation, only to completely discard this feature later. But those early models suffered greatly from overheating, so it's not worth it; just buy a PS2 instead. Interestingly, all PS3 consoles are fully backwards compatible with PSX games. - How to check: like with the PSX and PS2, either the box or the label at the back.
- Tip: all Super Slim revisions from
CECH-42XXonwards should have a 28 nm RSX.
As you see, I'm not into console modding or hacking, so the previous recommendations might not suit you. I favor robustness, game compatibility and output quality, not ease of tampering. Some of the revisions listed above are notoriously difficult or impossible to modify or run custom firmware with, so beware!